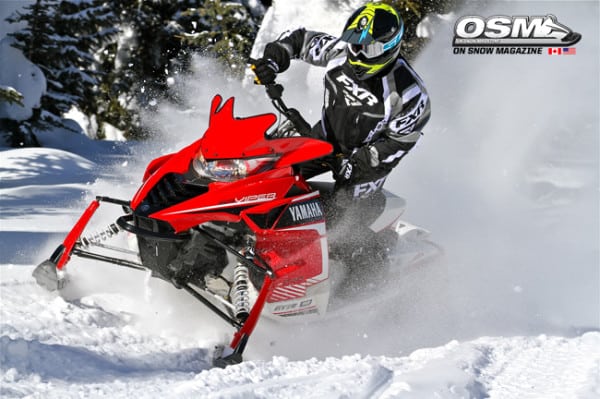
So you’ve read all of the blogs, checked a few websites, visited a couple early season events and after hydrating with your riding buddies in shop you decided it was time to purchase a new sled. After the final decision was made on which model, your local friendly dealer has helped you through the purchase process of picking the right machine with all of the correct colors and options to suite your needs. You’ve waited for months and run through your mind all of the new adventures your going to have this coming season and especially how your buddies will be jealous with your new found riding ability brought on by having the latest wonder buggy under you. Finally after all the anticipation you get that phone call from the dealer telling you “it” has arrived. The day is here, its in our garage, but now what are you to do until the flakes fly? Well OSM is to the rescue once again with 10 simple set-up tips for that shiny new ride.

Remember that awkward blind dat your pal set you up on with the farmer’s daughter Bernice? While your new buggy is way more attractive, now is the time to get to know her. Grab a beverage and take a seat on the new sled in the shop and page through the owner’s manual to learn little tidbits about your sled. Today’s modern digital displays offer up a lot of information and knowing how to use it before you’re bombing down a local trail is helpful.
1 GET ACQUAINTED

Now that you’ve found the engine temp function (if so equipped) prop your scooter up on a track stand and fire that sucker up. Old-schoolers call this heat cycling and it’s a good way to break-in the engine before that first ride. Allow the sled to idle until you see 100°F on the gauge and then run the motor up and down a bit through the rpms (not like some factory backed throttle jockey at the local races either, this motor is new and tight) just rev the engine enough to allow it to get hot, but not overheat. Now shut it off and let it cool down completely, you can repeat this step multiple times before the snow flies (remember to ensure you got plenty of fresh air in the shop while doing so).
2 HEAT CYCLE

With the machine sitting flat on the floor (not propped on a dolly) spend time moving around on the seat to find your perceived happy place. Get out the wrenches and adjust the handle bar angle, brake lever and throttle lever to your liking. So many overlook this little task, but experienced riders know how they like the controls to feel, after all this is one of only three “touch points” you have with the buggy, so make it feel good. A racer trick is to snug down the brake and throttle lever just enough to avoid them moving during a normal ride, but still loose enough that they will rotate on the bars in you do happen to roll or crash your sled. If they are snug, there’s a good chance they will break.
3 FIND YOUR HAPPY PLACE

The average weight of a snowmobiler (with riding gear) is approximately 200-220lbs, and it is to this weight range that most modern sleds come calibrated for. While it’s okay to make some spring pre-load adjustments now, don’t get crazy. You’ll find how to adjust pre-load, or “ride-in” in the owner’s manual (you know the section you just breezed past while you were sipping suds). Often times, until pivot points, shock seals/bushings and new components wear-in, things are a bit taut; a rule of thumb is to ride the sled for a few hundred miles first, allow everything to thaw, grease it again and “then” make some adjustments for how you like to ride. If you notice the rear bumper is within 3-inches of the shop floor when your in the saddle, adjust the rear spring pre-load and mix in a few salads for the next few weeks.
4 RIDE IN

Take some additional time to get to know your new stable mate by poking around underneath her shiny dress…as in look under the cowling. Top off the oil tank, check the chaincase fluid, place the spare belt in its holder, check battery connections, find the tool kit (that’s become a joke on modern sleds), and just give things a good once over so you are familiar with it in case you need to dive in there when its -25°F, dark and you’re in the middle of the woods. Trust us…we know.
5 GROPING

Since you found all of the grease zerks while paging through the manual, take the time to “re-grease” all of them with your favorite, top-shelf, synthetic low-temp grease. Didn’t they do that at the factory you say? In today’s world of cost cutting the manufacturers are always looking at ways to save money. There’s a good chance the assembly line workers only squirted in the minimum amount possible in all of those squeaky spots.
6 LUBE IT AGAIN

New drive belts typically have a mold release agent on them. You’ve now heat cycled the motor for a few months, which also put some heat into the belt and allowed the mold release to get on the clutches. Remove the belt (another handy piece of know-how figure out now versus trailside), wash it with hot soapy water and allow it to dry (ou can also heat cycle that spare belt and do the same thing). While the belts are drying, take a clean dry rag and use acetone or isopropyl alcohol to wipe down the clutch sheaves thoroughly. With the cost of new belts these days, this little practice can save you a costly repair bill and greatly extend belt life.
7 CLUTCHING & BELTS

We always recommend having a spare set of fresh carbides ready to go, no matter the age of your sled or condition. Much like grease, the factories tend to skimp on stock wear bars, both in terms of how much carbide is installed, but also the quality of the insert. More often than not, these stock units will not last long during those first couple of rides, heck the OSM crew has been known to burn through a set in the first outing. For this reason, it’s nice to have a set ready to go in the shop. Verify the bolt pattern is the same and keep ‘em on the ready when the stock ones get burnt off in that first ride of the year. Yeah, you know you’re going to ride on that first 2-inch snowfall, even though it’s against your better judgment.
8 FUTURE CARVING

While some shop monkeys like to get after it the moment their sled arrives by adding a host of aftermarket performance goods and accessories we believe in riding the sled stock first. Why? Well for starters, proper break-in of your new snowmobile is critical to ensure it now only lasts, but delivers peak performance. What’s more, it allows you to get more familiar with the snowmobile in real riding conditions allowing you to better determine how big of windshield you may really need; what kind of storage bags make sense; does it need additional traction or carbide up front; and just how big of a nitrous shot will it take to smoke your buddy across that infamous Canadian pond.
9 ACCESSORIZE

You’ve probably heard us say it before, but at the end of the day, snowmobiling is about having fun, regardless of what model, year, or condition snowmobile you have. Enjoy the time spent with family and friends, enjoy a cold barley pop AFTER the ride, and enjoy the season.
10 ENJOY


