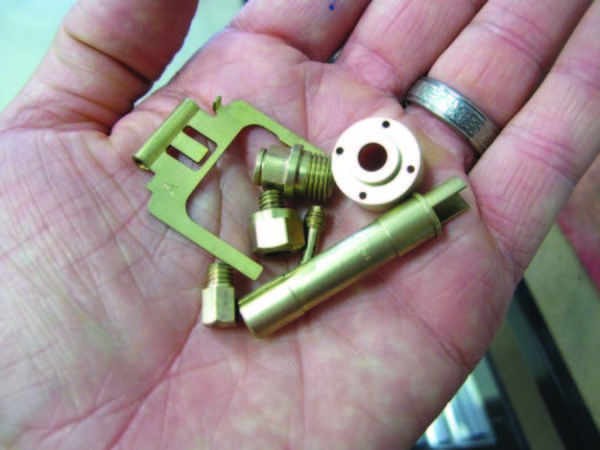
Carbureted sleds are a dwindling breed. But if you’re like most snowmobilers you’ve likely “hung-on” to a few faves from the past that still employ the round slide Mikuni or other similar carb. If so, you likely know all too well how the ravages of time, lack of use, and today’s ethanol spiked fuel work together to create a green, hardened funk inside the float bowl and other fuel passageways. When it does, removing, dismantling and cleaning the carb and associated brass parts is the only way to get your scooter up and running again. Over the years, the shop monkeys here at OSM have tried virtually every off-the-shelf carb cleaner and chemical dip we could find, all with varying results. That is until we found our favorite blend of cleaning solutions at our local grocery store and our brass has never looked better.

STEP 1: Most carb issues can be found in the float bowl. This Mikuni round slide from a forgotten in the weeds ZRT 800 was victim of badly degraded ethanol fuel resulting in a thick dark sludge covering all of the internal brass.

STEP 2: If you don’t know your way around the inside of a carburetor ask someone who does or simply go online and you’ll quickly find an exploded view of a carb schematic. If the carb is a basket case, remove every hunk of brass you can find. If it just needs a quick clean, go for the top of mind items like the main jet and the always prone to plugging pilot jet.

STEP 3: Part one of our magic carb cleaning formula can be found in the cleaning aisle of most grocery or big box stores. Toilet bowl cleaner does an amazing job on brass parts but it MUST BE the right kind. Stay away from the newer gel type cleaners; it needs to be a pure liquid cleaner. Our favorite is “The Works” brand, it has the same consistency as water and is generally the cheapest one on the shelf…bonus!

STEP 4: We removed all of the brass from the bottom of the venturi to the float bowl. Make sure to remove any rubber or fiber type gaskets that might be used, they will not survive the toilet bowl cleaner bath. Also pay attention to what kind of fuel inlet needle your carburetor has, some have a rubber tip and must be cleaned with more conventional cleaning solutions.

STEP 5: You can reuse the solution more than once; a discarded pickle or mayonnaise jar with lid is an ideal cleaning/soaking container. Simply drop the dirty brass into the mixture, give it a swish and set it aside. Depending upon how dirty the brass is, you’ll want the parts to soak for a minimum of an hour. For really dirty items, we typically let the solution work overnight.

STEP 6: After soaking in the toilet cleanser overnight, your brass parts should come out looking shiny. Before you reinstall you’ll need to neutralize the toilet bowl solution. We’ve tried spraying carb cleaner and a vinegar soak, both with mixed results. A solution of pure lime juice or lemon juice turns out to work the best. Not only does it remove any remaining toilet cleaner residue, but it also leaves your jets smelling great. After the soak, dry the parts using compressed air.

STEP 7: Boom…more often than not the jets and associated brass parts go back into the carb looking better than they ever did…even new. Don’t forget to reinstall any removed rubber or fiber gaskets; refuel with treated, non-oxygenated fuel, and fire that buggy up.


I’ve been trying to clean my brass I use flour vinegar and salt in a change my blast into copper so I start using anything I can find to change it back lucky I went into your website I hope it changes my breath is hard for me because I don’t know how to read I try everything but it shows me on the email on the web also for cleaning copper but doesn’t do nothing for the brass I’m going to try that toilet stall and I hope it changes my grass back into the same color it was before so I can recycle and get more for my money thank you